How to customise machines
MAAS provides the capability to customise machines. This article will help you learn:
- How to customise machine storage
- How to pre-seed with curtin
- How to pre-seed with cloud-init
- How to choose Ubuntu kernels
- How to set global kernel boot options
- How to create tags with built-in kernel options
- How to use resource pools
- How to enable hardware sync on a machine
- How to configure hardware sync interval
- How to view updates from hardware sync
How to customise machine storage
This section will show you:
- How to set global storage layouts
- How to set per-machine storage layouts
- How to set the default erasure configuration
Note that layouts can be set globally and on a per-machine basis. For additional information on storage layouts, see the Storage layouts reference article.
How to set global storage layouts
All machines will have a default layout applied when commissioned. An administrator can configure the default layout on the ‘Settings’ page, under the ‘Storage’ tab.

NOTE: The new default will only apply to newly-commissioned machines.
How to set per-machine storage layouts
An administrator can change the layout for a single machine as well as customise that layout providing this is done while the machine has a status of ‘Ready’. This is only possible via the CLI: to see how, click the “CLI” option for your version and delivery method above.
NOTE: Only an administrator can modify storage at the block device level (providing the machine has a status of ‘Ready’).
How to set the default erasure configuration
A default erasure configuration can be set on the ‘Settings’ page by selecting the ‘Storage’ tab.
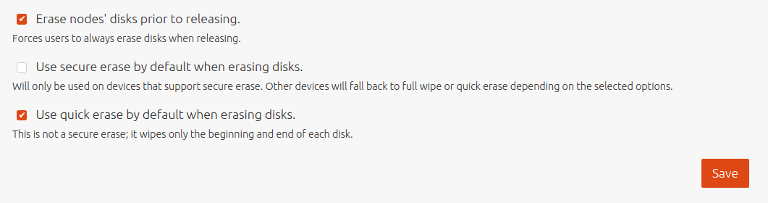
If option ‘Erase machines’ disks prior to releasing’ is chosen then users will be compelled to use disk erasure. That option will be pre-filled in the machine’s view and the user will be unable to remove the option.
With the above defaults, the machine’s view will look like this when the Release action is chosen:

Where ‘secure erase’ and ‘quick erase’ can then be configured by the user.
You can customise the Curtin installation by either editing the existing curtin_userdata template or by adding a custom file as described above. For a flowchart, showing where Curtin and pre-seeding fits into the deployment picture, see How images get deployed.
Curtin provides hooks to execute custom code before and after installation takes place. These hooks are named early and late respectively, and they can both be overridden to execute the Curtin configuration in the ephemeral environment. Additionally, the late hook can be used to execute a configuration for a machine being installed, a state known as in-target.
Curtin commands look like this:
foo: ["command", "--command-arg", "command-arg-value"]
Each component of the given command makes up an item in an array. Note, however, that the following won’t work:
foo: ["sh", "-c", "/bin/echo", "foobar"]
This syntax won’t work because the value of sh‘s -c argument is itself an entire command. The correct way to express this is:
foo: ["sh", "-c", "/bin/echo foobar"]
The following is an example of an early command that will run before the installation takes place in the ephemeral environment. The command pings an external machine to signal that the installation is about to start:
early_commands:
  signal: ["wget", "--no-proxy", "http://example.com/", "--post-data", "system_id=&signal=starting_install", "-O", "/dev/null"]
The following is an example of two late commands that run after installation is complete. Both run in-target, on the machine being installed.
The first command adds a PPA to the machine. The second command creates a file containing the machine’s system ID:
late_commands:
  add_repo: ["curtin", "in-target", "--", "add-apt-repository", "-y", "ppa:my/ppa"]
  custom: ["curtin", "in-target", "--", "sh", "-c", "/bin/echo -en 'Installed ' > /tmp/maas_system_id"]
How to pre-seed with cloud-init
For a flowchart, showing where cloud-init fits into the deployment picture, see How images get deployed.
It’s easy to customise cloud-init via the web UI. When you’ve selected a machine and choose ‘Take action >> Deploy,’ you’ll be presented with the following screen:

Select a viable release (in this case, “Ubuntu 18.04…”) and check the box labelled “Cloud-init user-data…”:

Paste the desired script directly into the box, and select “Start deployment for machine.” For example, to import an SSH key immediately after your machine deployment, you could paste this script:
#!/bin/bash
(
echo === $date ===
ssh-import-id foobar_user
) | tee /ssh-key-import.log
NOTE: No script validation of any kind is provided with this capability. You will need to test and debug your own cloud-init scripts.
This section will show you:
- How to set a default minimum kernel for enlistment and commissioning
- How to set a minimum deployment kernel for a machine
- How to set a specific kernel during machine deployment
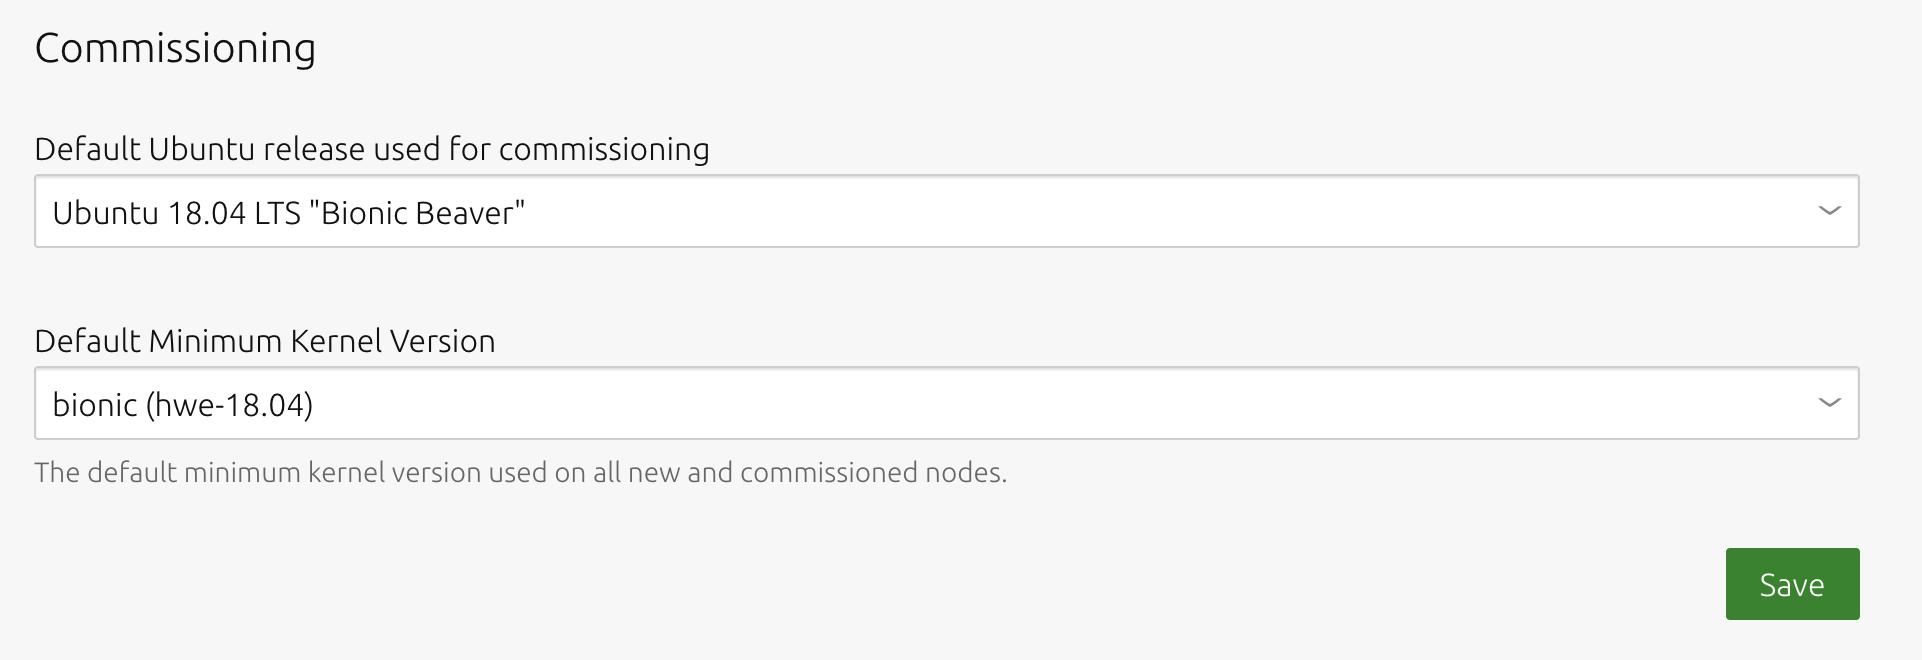
How to set a default minimum kernel for enlistment and commissioning
To set the default minimum enlistment and commissioning kernel (based on Ubuntu release: GA kernel) for all machines visit the ‘General’ tab of the ‘Settings’ page and select a kernel in the ‘Default Minimum Kernel Version’ field of the Commissioning section. Don’t forget to click ‘Save’.
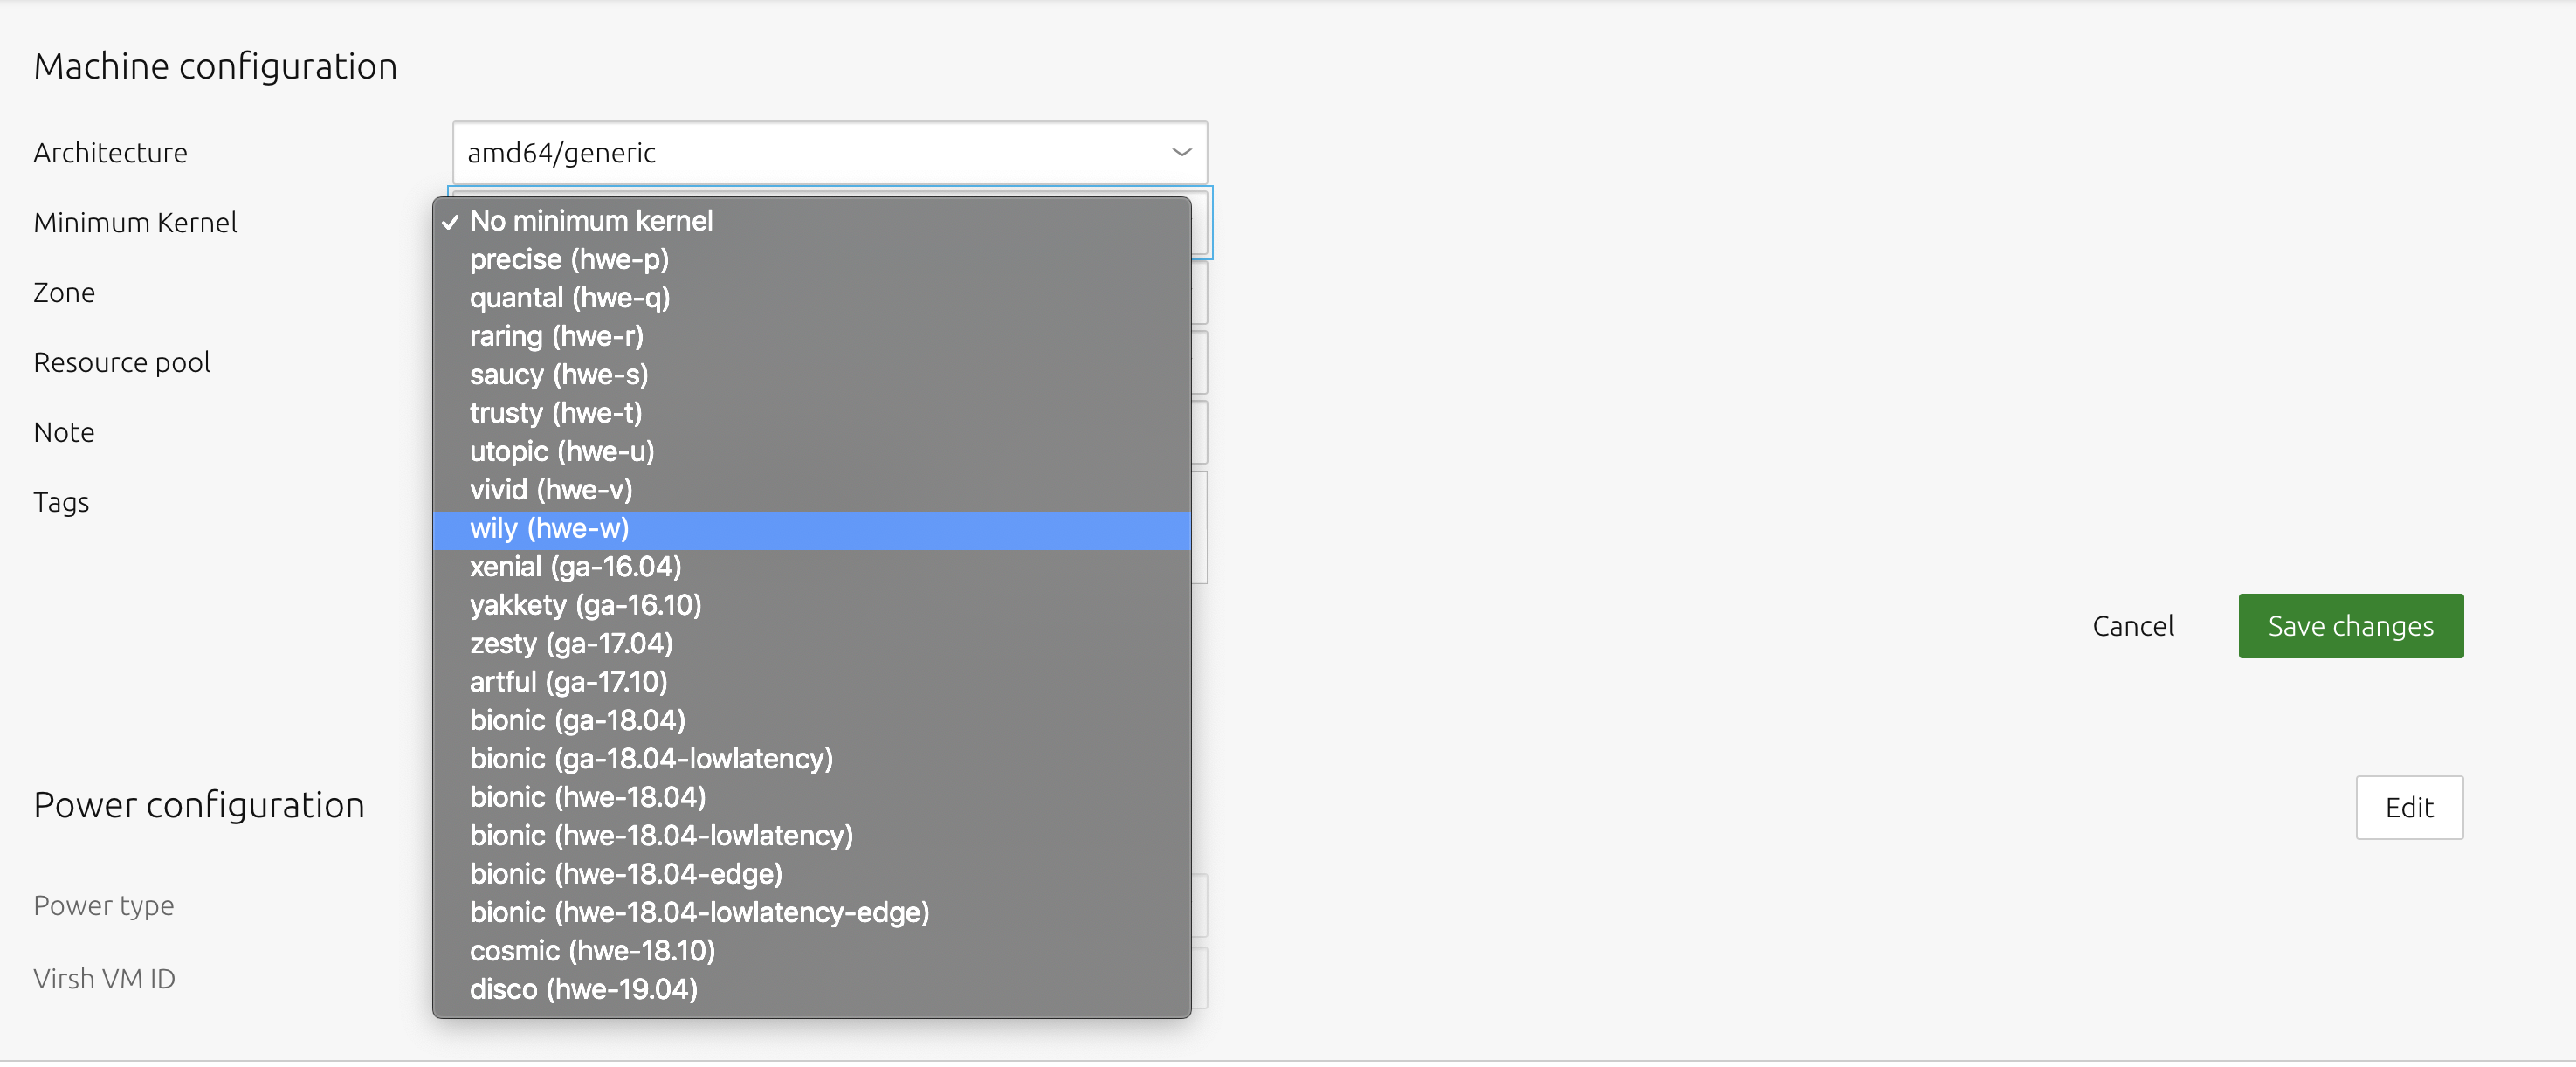
How to set a minimum deployment kernel for a machine
To set the minimum deploy kernel on a machine basis, click on a machine from the ‘Machines’ page of the web UI and switch to its ‘Configuration’ page. Click ‘Edit’ in the ‘Machine configuration’ section, select a kernel in the ‘Minimum Kernel’ field followed by ‘Save changes’.
How to set a specific kernel during machine deployment
To set a specific kernel during deployment, select a machine from the ‘Machines’ page and choose ‘Deploy’ under ‘Take action’. Then choose a kernel from the (third) kernel field. Hit ‘Deploy machine’ to initiate the deployment.

MAAS verifies that the specified kernel is available for the given Ubuntu release (series) before deploying the machine.
How to set global kernel boot options
To set kernel boot options globally, as an admin, open the ‘Settings’ page and on the ‘General’ tab scroll down to the ‘Global Kernel Parameters’ section:

Type in the desired (space separated) options and click ‘Save’. The contents of the field will be used as-is. Do not use extra characters.
How to create tags with built-in kernel options
You can create tags with embedded kernel boot options. When you apply such tags to a machine, those kernel boot options will be applied to that machine on the next deployment.
To create a tag with embedded kernel boot options, use the following command:
maas $PROFILE tags create name='$TAG_NAME' \
    comment='$TAG_COMMENT' kernel_opts='$KERNEL_OPTIONS'
For example:
maas admin tags create name='nomodeset_tag' \
    comment='nomodeset_kernel_option' kernel_opts='nomodeset vga'
This command yields the following results:
Success.
Machine-readable output follows:
{
    "name": "nomodeset_tag",
    "definition": "",
    "comment": "nomodeset_kernel_option",
    "kernel_opts": "nomodeset vga",
    "resource_uri": "/MAAS/api/2.0/tags/nomodeset_tag/"
}
You can check your work with a modified form of the listing command:
maas admin tags read | jq -r \
'(["tag_name","tag_comment","kernel_options"]
|(.,map(length*"-"))),(.[]|[.name,.comment,.kernel_opts])
| @tsv' | column -t
This should give you results something like this:
tag_name             tag_comment                  kernel_options
--------             -----------                  --------------
virtual
new_tag              a-new-tag-for-test-purposes
pod-console-logging  console=tty1                 console=ttyS0
nomodeset_tag        nomodeset_kernel_option      nomodeset       vga
This section will explain:
- How to add a resource pool
- How to delete a resource pool
- How to add a node to a resource pool
- How to remove a node from a resource pool
- How to add a VM host to a resource pool
- How to remove a VM host from a resource pool
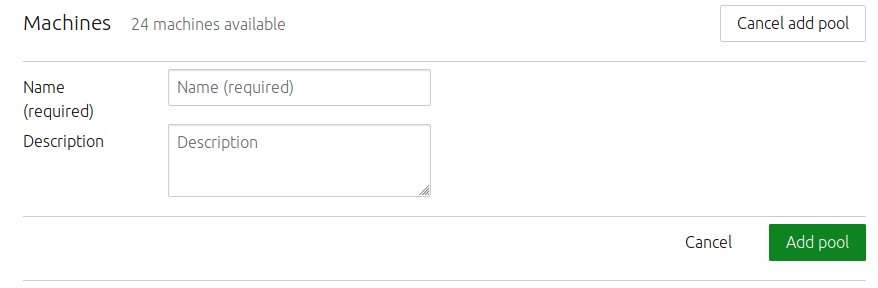
Use the Add pool button to add a new resource pool.
After giving your new pool a name and description, click the Add pool button:
To delete a resource pool, click the trashcan icon next to the pool.

NOTE: If you delete a resource pool, all machines that belong to that resource pool will return to the default pool.
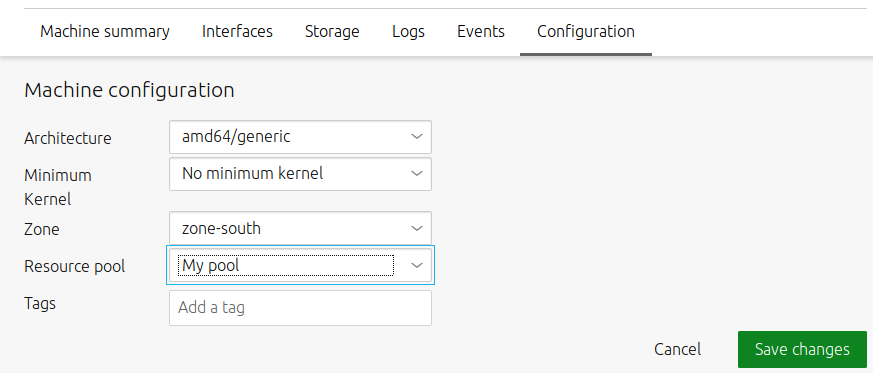
How to add a machine to a resource pool
To add a machine to a resource pool, on the Machines page, select the machine you want to add to the resource pool. Next, select the Configuration tab. Now select the resource pool and click the Save changes button.
How to remove a machine from a resource pool
To remove a machine from a resource pool, follow the same procedure you would use to add a machine, but select “default” as the new resource pool. This action will return the machine to the default resource pool.
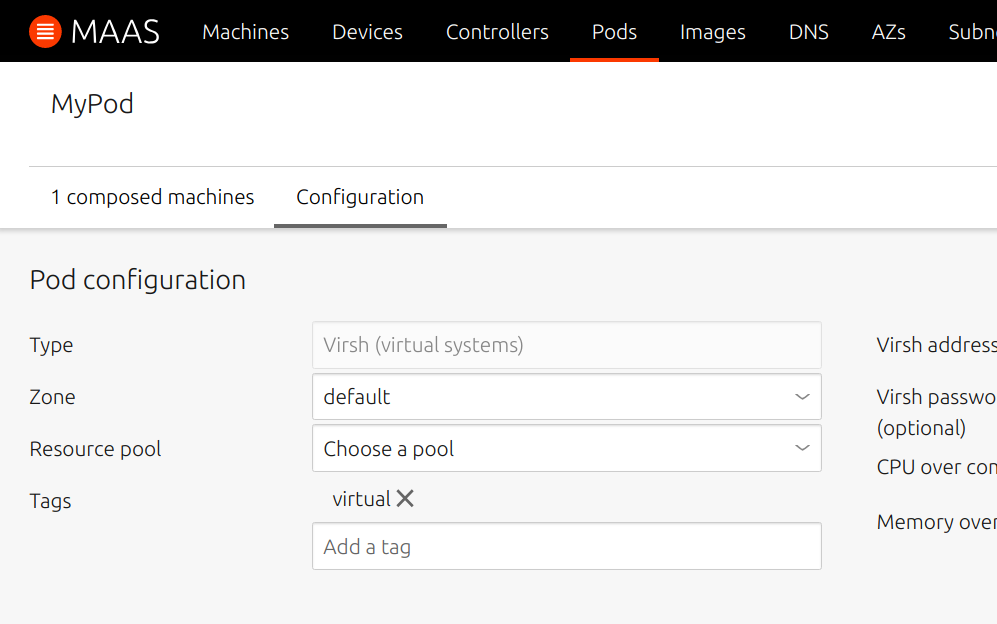
How to add a VM host to a resource pool
You can add a VM host to a resource pool when you create a new VM host, or you can edit a VM host’s configuration:
How to remove a VM host from a resource pool
To remove a VM host from a resource pool, follow the same procedure you would use to add a VM host to a resource pool, except select “default” as the new resource pool. This action will return the machine to the default resource pool.
How to enable hardware sync on a machine
NOTE: MAAS hardware sync may leak the MAAS admin API token. You may need to rotate all admin tokens and re-deploy all machines that have hardware sync enabled. To find out whether this is an issue, and how to fix it, see the troubleshooting instructions for this problem.
To enable Hardware sync on a machine, select a machine from the machine list and choose deploy from the “Take action” dropdown menu:

Set the parameters as indicated below, and choose “Start deployment for machine”:

Once you’ve enabled hardware sync, any changes you make to the physical device, or to the VM through the VM host, will show up in the appropriate page for the deployed machine as soon as the sync interval has passed.
How to view updates from hardware sync
Hardware sync updates the machine’s blockdevice, interface and device sets on a periodic basis. These can be viewed in machine details:

Updated BMC configuration and tags can also be viewed on the machine itself. The timestamps of the last time data was synced and the estimated next time the machine will be synced can be seen in the last_sync and next_sync fields respectively.
How to configure hardware sync interval
The hardware sync interval is configured globally in MAAS settings:

This value is then applied to the machine at time of deployment. You cannot modify a deployed machine’s sync interval. You can view a machine’s specific sync interval via the sync_interval field on a given machine.