How to put machines to work
The ultimate purpose of MAAS is to deploy and manage machines. It’s important to understand how images get deployed – as explained in About the machine life-cycle, machines must first be enlisted or commissioned, then allocated, then deployed. This article will help you build on that understanding by explaining:
Note that if you are using your own commissioning scripts, and you do not want them to automatically run every time, you must specify noauto, as in this script snippet:
#!/bin/bash
#
# --- Start MAAS 1.0 script metadata ---
# name: 50-script-example
# title: Example
# description: Just an example
# script_type: commissioning
# tags: noauto
If you do not specify noauto, your custom commissioning scripts will run every time commissioning is attempted.
To commission a machine:
-
Go to the “Machines” page.
-
Select the machine(s) you want to commission.
-
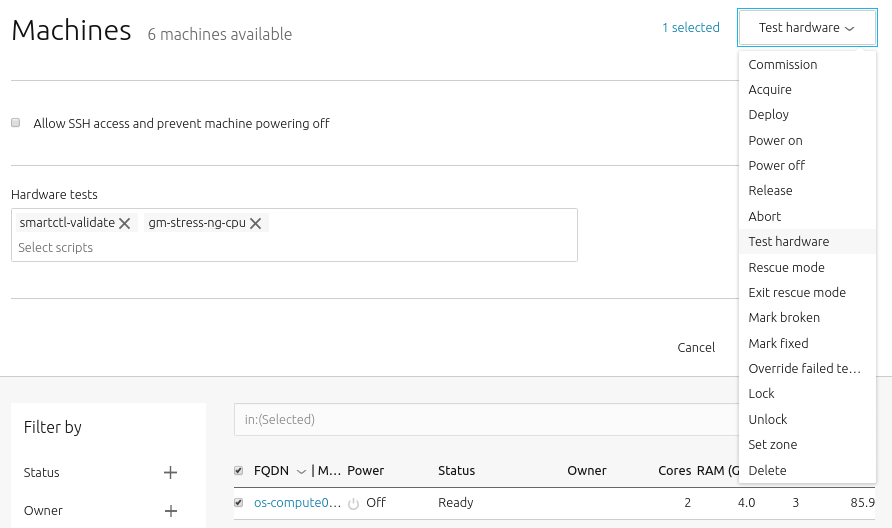
Choose “Commission” under the “Take action” drop-down menu:

You have the option of selecting some extra parameters (checkboxes) and performing hardware tests.
These options include:
-
Allow SSH access and prevent machine powering off: Machines are normally powered off after commissioning. This option keeps the machine on and enables SSH so you can access the machine.
-
Retain network configuration: When enabled, preserves any custom network settings previously configured for the machine. See Networking for more information.
-
Retain storage configuration: When enabled, preserves any storage settings previously configured for the machine. See Storage for more details.
-
Update firmware: Runs scripts tagged with
update_firmware. -
Configure HBA: Runs scripts tagged with
configure_hba.
-
Click the Hardware tests field to reveal a drop-down list of tests to add and run during commissioning. See Hardware testing for more information on hardware testing scripts.
-
Finalise the directive by hitting “Commission machine”.
While commissioning, the machine status will change to reflect this state (Commissioning). MAAS discovers the machine’s network topology. MAAS then prompts a machine network interface to connect to the fabric, VLAN, and subnet combination for configuration. Usually, MAAS assigns a static IP address out of the reserved IP range for the subnet (“Auto assign” mode). The next section details several assignment modes.
Once commissioned, a machine’s status will change to Ready, and an extra tab for the machine called “Commissioning” will become available. This tab contains the results of the scripts executed during the commissioning process.
Once commissioned, you may consider adding a tag to this machine. The next step is testing and deployment.
This section explains:
- How to download built-in scripts
- How to upload scripts
- How to debug script failures
- How to locate script files
- How to locate log files
- How to run all scripts manually
- How to apply a hardware test
- How to test network links
- How to detect slow network links
- How to configure network validation and testing scripts
- How to customise network testing
You can also refer to technical details and examples for commissioning scripts and testing scripts as needed.
How to download built-in scripts
You can download the source for all commissioning and test scripts via the API with the following command:
maas $PROFILE node-script download $SCRIPT_NAME
The source code to all built-in scripts is available on launchpad↗.
Scripts can be uploaded to MAAS using the web UI. Select the ‘User scripts’ tab of the ‘Settings’ page - the ‘Commissioning scripts’ section is near the top. Within the Commissioning scripts section, click the Upload script button followed by ‘Choose file’ to open a requester, locate the script, and select Upload to upload it to MAAS.
A status message of Commissioning script created will appear. You’ll then be able to select your script after selecting Test hardware from a machine’s ‘Take action’ menu.
NOTE: MAAS executes scripts in lexicographical order. This order allows you to control when your scripts execute, and whether they run before or after the standard MAAS scripts.
Clicking on the title of a completed or failed script will reveal the output from that specific script.

If you need further details, especially when writing and running your own scripts, you can connect to a machine and examine its logs and environment.
To do this, enable Allow SSH access and prevent the machine from powering off when selecting ‘Test hardware’ from the machine ‘Take action’ menu.
Because scripts operate within an ephemeral version of Ubuntu, enabling this option stops the machine from shutting down, allowing you to connect and probe a script’s status.
As long as you’ve added your SSH key to MAAS, you can connect with SSH to the machine’s IP with a username of ubuntu. Type sudo -i to get root access.
Commissioning and testing script files may be found in the following directories:
/tmp/user_data.sh.*/scripts/commissioning/: Commissioning scripts/tmp/user_data.sh.*/scripts/testing/: Hardware testing scripts
Commissioning and testing log files may be found in the following directories:
/tmp/user_data.sh*/out//var/log/cloud-init-output.log/var/log/cloud-init.log
How to run all scripts manually
You can also run all commissioning and hardware-testing scripts on a machine for debugging.
/tmp/user_data.sh.*/bin/maas-run-remote-scripts \
    [--no-download] \
    [--no-send] \
    /tmp/user_data.sh.*
Where:
--no-download: Optional. Do not download the scripts from MAAS again.--no-send: Optional. Do not send the results to MAAS.
For example, to run all the scripts again without downloading again from MAAS:
/tmp/user_data.sh.*/bin/maas-run-remote-scripts --no-download /tmp/user_data.sh.*
Here, all the scripts are run again after downloading from MAAS, but no output data is sent to MAAS:
/tmp/user_data.sh.*/bin/maas-run-remote-scripts --no-send /tmp/user_data.sh.*
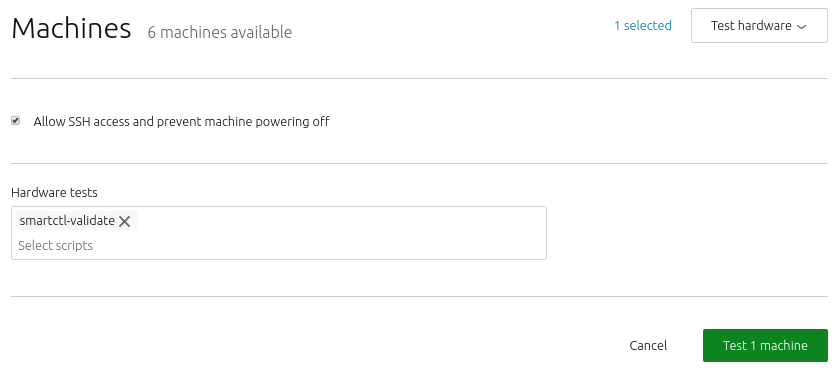
To launch a test, select the target machine from the ‘Machines’ page and use the ‘Take action’ drop-down menu to select ‘Test hardware’. When ready, hit the ‘Test machine’ button. Here, a test is applied to a deployed machine:
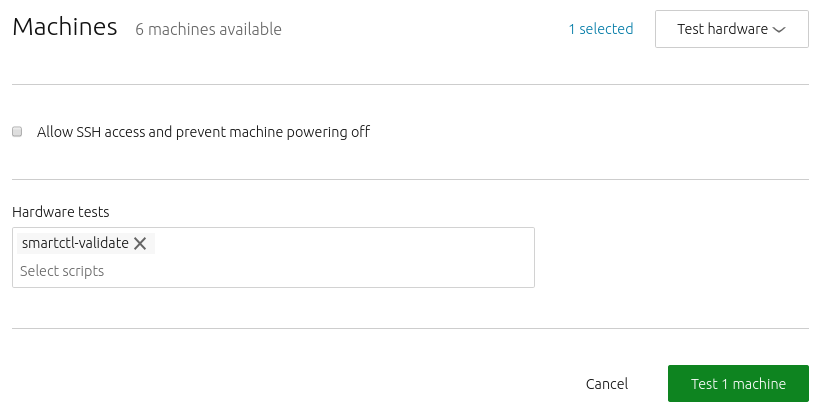
There is the option of not powering off the machine and to allow SSH access.
A default test will be selected (smartctl-validate, a hard drive test) but you can choose others by clicking the ‘Select scripts’ label. Doing so will reveal the following choices:
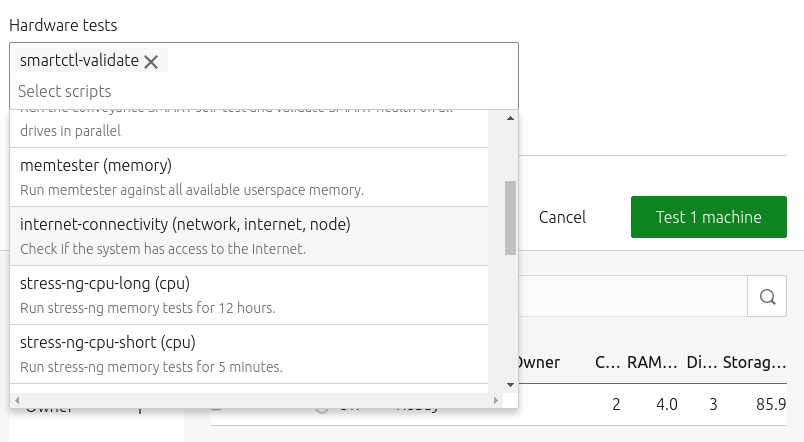
See Commissioning scripts reference for more details on how these scripts work and how you can write your own.
MAAS can check whether links are connected or disconnected, so that you can detect unplugged cables. If you are not running MAAS 2.7 or higher, you must first upgrade and then recommission your machines to find disconnected links. MAAS not only reports unplugged cables, but also gives a warning when trying to configure a disconnected interface. In addition, administrators can change the cable connection status after manually resolving the issue.
When MAAS detects a broken network link, users will see a screen similar to this one:

If you’re already using a version of MAAS less than 2.7, you will want to upgrade and recommission your existing machines to check link status. Note that you will also receive a warning from MAAS when trying to configure a disconnected interface.
Once you have manually repaired the broken connection, an administrator can change cable connection status:

How to detect slow network links
As servers and hardware get faster, the chances increase that you might encounter a speed mismatch when connecting your NIC to a network device. MAAS can warn you if your interface is connected to a link slower than what the interface supports, by automatically detecting link and interface speed and reporting them via the UI:

Depending on your physical hardware, the problem may not be repairable, but once you identify a slow link, you can replace a slow switch without recommissioning.
Administrators can change or update the link and interface speeds after manual changes to the connection:
maas $PROFILE interface update $SYSTEM_ID $INTERFACE_ID link_speed=$NEW_LINK_SPEED \
interface_speed=$NEW_INTERFACE_SPEED
This functionality is only available through the MAAS CLI.
How to configure network validation and testing scripts
MAAS allows you to configure network connectivity testing in a number of ways. If MAAS can’t connect to the rack controller, deployment can’t complete. MAAS can check connectivity to the rack controller and warn you if there’s no link, long before you have to try and debug it. For example, if you can’t connect to your gateway controller, traffic can’t leave your network.
Via the Web UI only, MAAS can check this link and recognise that there’s no connectivity, which alleviates hard-to-detect network issues:

Users can now test their network configuration to check for:
- Interfaces which have a broken network configuration
- Bonds that are not fully operational
- Broken gateways, rack controllers, and Internet links
In addition, MAAS can comprehensively test Internet connectivity testing. You can give a list of URLs or IP addresses to check from the network testing screen:

In the ephemeral environment, standard DHCP is still applied, but when network testing runs, MAAS can apply your specific configuration for the duration of the test. While all URLs / IPs are tested with all interfaces, MAAS can test each of your interfaces individually, including breaking apart bonded NICS and testing each side of your redundant interfaces. You can also run different tests on each pass, e.g., a different set of URLs, although each run would be a different testing cycle.
To test individual interfaces, for example, you could issue the following CLI command:

Note that in this command, we are testing internet connectivity to the single interface “br0.”
How to customise network testing
MAAS allow you to customise network testing according to your needs. You can create your own commissioning scripts and tests related to networking, and you can run them during the network testing portion of the MAAS workflow.

There are no particular restrictions on these scripts, so you can test a wide variety of possible conditions and situations. Administrators can upload network tests and test scripts. Administrators can also create tests which accept an interface parameter, or scripts which apply custom network configurations.
Users can specify unique parameters using the API, override machines which fail network testing (allowing their use), and suppress individual failed network tests. Users can also review the health status from all interface tests, even sorting them by interface name and MAC. In addition, MAAS can report the overall status of all interfaces.
To allocate a node with the web UI, select a machine which is in the “Ready” state, and drop down the “Take action” menu:

Select “Allocate” from the drop-down menu, which will bring you to a confirmation screen:

MAAS will allocate the selected machine; you can now find it in the list of “Allocated” machines:

NOTE: To allocate a node, it must have a status of ‘Ready’.
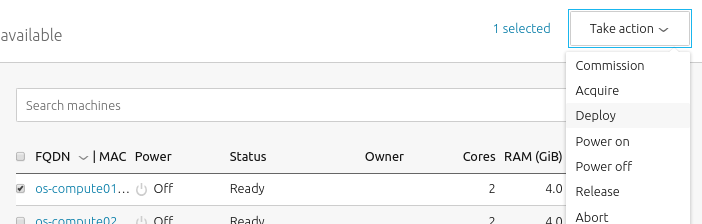
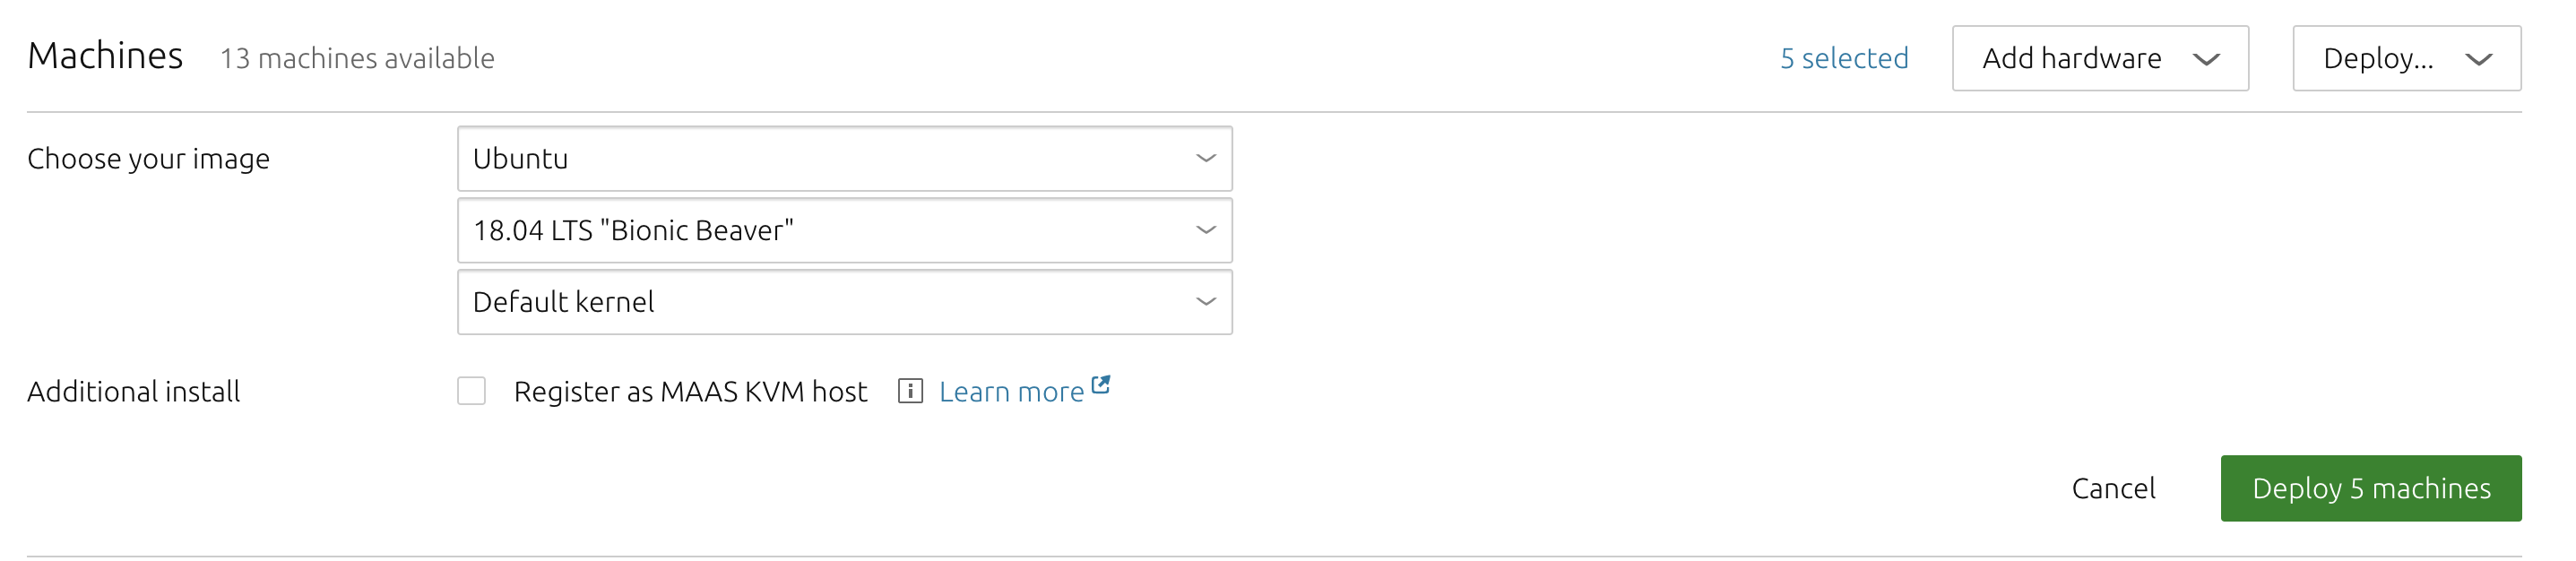
To deploy directly from MAAS, select one or more machine(s) and press the ‘Deploy’ button.
You then have the option of deviating from the default OS, release, and kernel. When ready, press ‘Deploy X machine(s)’ (where ‘X’ is the number of machines selected).
While a machine is deploying its status will change to Deploying to ‘OS’, where ‘OS’ is the name of the OS being deployed (e.g. ‘Deploying to Ubuntu 16.04 LTS’).
Once a machine has finished deploying its status will change to just the name of the OS (e.g. ‘Ubuntu 18.04 LTS’).